TUTORIAL
Partner App
Welcome to the Internalia Group Partner system.
This App provides the partner channel with a solid and reliable system to resolve all the procedures with autonomy.
You can make adjustments to the assigned instances and licenses at any time, and get information from your customers. For example, extend the expiration date of your instances instantly.
Know in detail the volume of operations and manage the accounts of each device. Get a consolidated list of active services by date period.
Activate notifications on your mobile device and get direct access to the query thread.
The most effective way of communication with the Internalia Group partner support team.
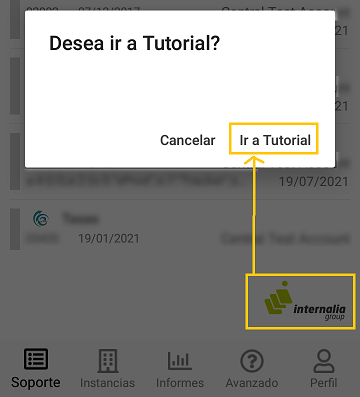
Access the Tutorial from the App: click on the Internalia Group logo in the section where you need help and a window will appear that will redirect you to the tutorial page corresponding to the section.
Sections
PartnerApp is divided into 5 sections

Support
In this section the user can communicate with the technical service through a dialogue via messages. There is a message thread for each assigned company.
Instances
It consists of a list with the instances available to the selected partner. From this section we will be able to edit instances and see its associated licenses, as well as the instance type and its configuration.
Reports
It is the visual part of sales engineering, where the user can see the global count of the instances and licenses in the form of configurable graphs.
Tools
It allows the user to show a list with the last actions done, after entering a specific pin/serial in the search.
Profile
Indicates the personal data of the user who has logged in.
Support / Query list
The list of queries has a toolbar at the top, and if the user is an Administrator, it also has a selector of associated partners.
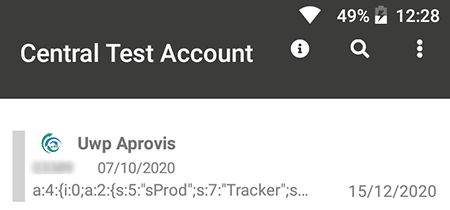
1. Top bar
In the list of queries there is an upper bar that contains 3 icons
- Show the support tutorial on the mobile screen.
- Search by keywords or by selecting the instance type (WDS, MCRM, S360, WTA) from the icon next to the search bar
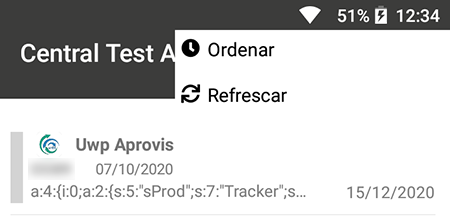
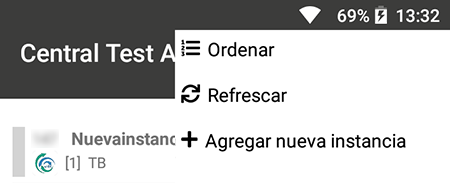
- Submenu with the following options:
- Sort the query list by: update date, creation date, inverted creation date, and reference.
- Refresh list.
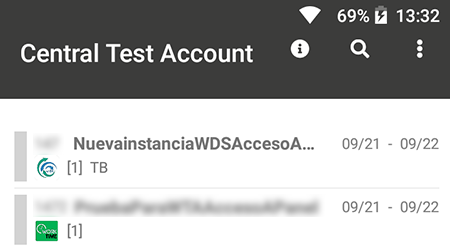
2. Contents of each item in the list
1st line
- Service type icon
- Instance name
2nd line
- Reference number
- Creation date
3rd line
- Partial information of the last comment
- Date for last update
Support / Support thread
Clicking on a query opens the support thread.
1. Top bar
In the thread there is a bar with 2 icons.
- New message (Add a message to the current thread).
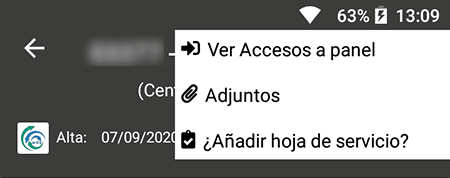
- Submenu with the following options:
- Show/hide messages of access to the web panel
- View attachments.
- Add service sheet with option to generate PDF.
New message
- Icon: Attach a file to the message.
- It has the same bottom toolbar like the thread.
- Field to add the comment.
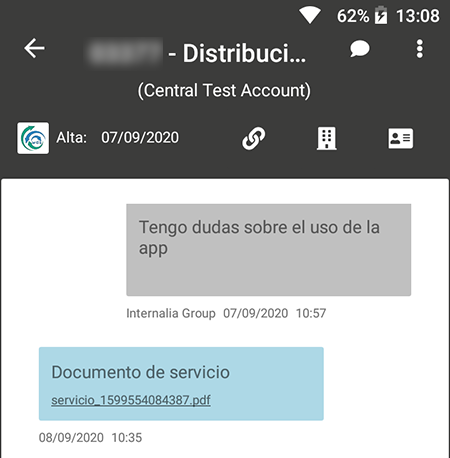
2. Bottom bar
Just below the top toolbar is the second bar.
- Image of the type of instance with the date of registration.
- Share link to the level 1 support web for the instance.
- View company.
- View licenses.
The explanation of the View company and View licenses options is in the Instances section:
3. Thread
Below all the toolbars is the query thread. The color of received messages is different from sent messages.
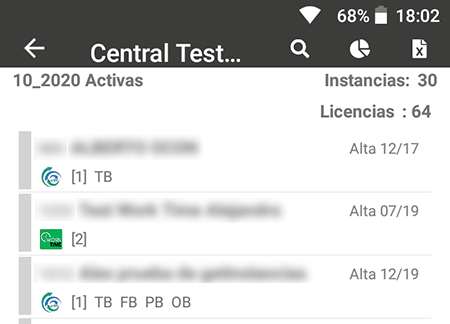
Instances / Instance list
1. Top toolbar
- Show the instance tutorial on your mobile screen.
- Search by keywords or by selecting the instance type (WDS, MCRM, S360, WTA) from the icon next to the search bar
- Submenu with the following options:
- Sort the list of instances by: reference, creation date, and reversed creation date.
- Refresh list.
- New instance (provisioning).
2. Instance info
- 1st line: ID, instance name, creation date and expiration date.
- 2nd line: type of instance (logo), number of licenses, contracted services and level (WDS).
3. Instance text colors
- Default color
- Instance about to expire
- Expired instance
Instances / Actions
By clicking on an instance in the list, a window with the available actions is displayed.
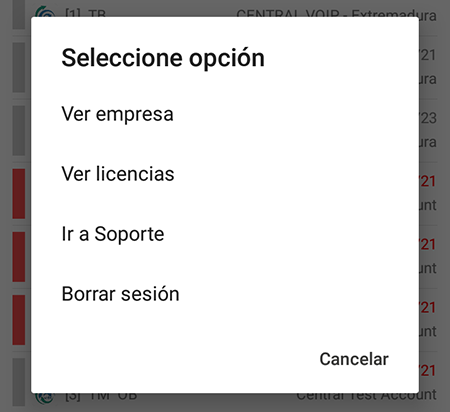
1. View company
Company settings varies by instance type. To edit the data or settings you must click on the edit icon
These are some data that can be edited:
- Instance name
- Activated services and profiles
- Manual Forms configuration
- Expiration date
- Renewal time (months)
- Instance parameters
2. View licenses
A list with all the licenses of the instance appears, you can see the details of that user or access the web panel impersonating that user.
With the license toolbar (top) you can add new licenses, search and refresh the list.
3. Go to support
Redirect to the support thread.
4. Delete session
This action is used to delete the session for the terminal to receive the new configuration. The session deletion serves the function of updating the configuration.
Instances / Provisioning
To access the window for creating a new instance, you must click the " Add new instance" option on the toolbar.
Steps to create a new instance
1. Select instance type: WDS, MCRM, S360, WTA
2. Enter the data
- Instance data: name, number of licenses, duration of the contract, etc.
- Customer data (personal data).
- Billing data (company data).
- Bank data.
3. Click on the "Provision" button to generate and read the contract. You can cancel provisioning in this step.
4. Generate the instance with the button on the top bar. Provisioning can no longer be canceled when pressing the button.
Unsubscription / Instance unsubscription
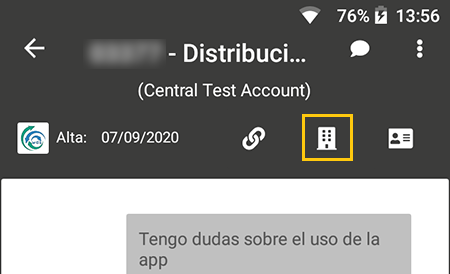
Instance unsubscribing request is accessible in several ways, either from Support, Instances or Reports. You must access the company information and click on the edit button, below you will be shown how to access from Support:
Press the Company icon in the support thread menu and then press the edit instance icon .
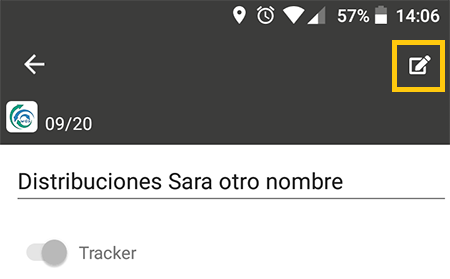
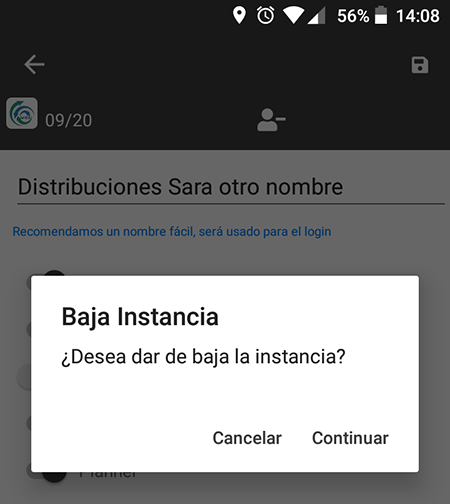
In the Edit instance menu you will find the icon for instance unsubscribing , a window will appear asking if you want to unsubscribe the instance: select "Continue".

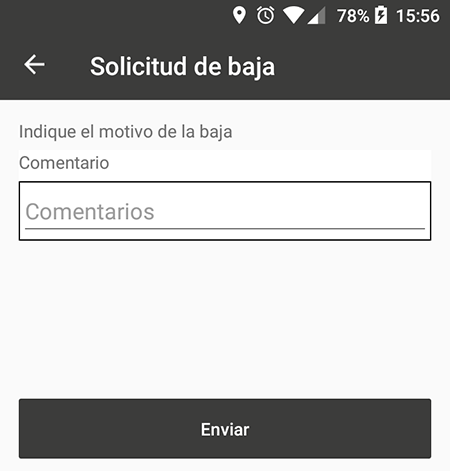
A window appears in which you must justify the reason for the unsubscribing, click on the "Send" button to confirm the unsubscribing request.
Unsubscription / License unsubscription
License unsubscribing is accessible in several ways, either from Support, Instances or Reports.
- From Support: select the thread of the corresponding instance and in the thread menu click on the licenses icon
- From Instances: select the instance in the list and click on "View licenses".
- From Reports: select the instance in the list that appears when clicking the icon and click on "View licenses".
To unsubscribe the license, click on the instance whose license you are going to unsubscribe.
Select "View licenses" and click on the license you want to unsubscribe, a window appears with the option to "View details".
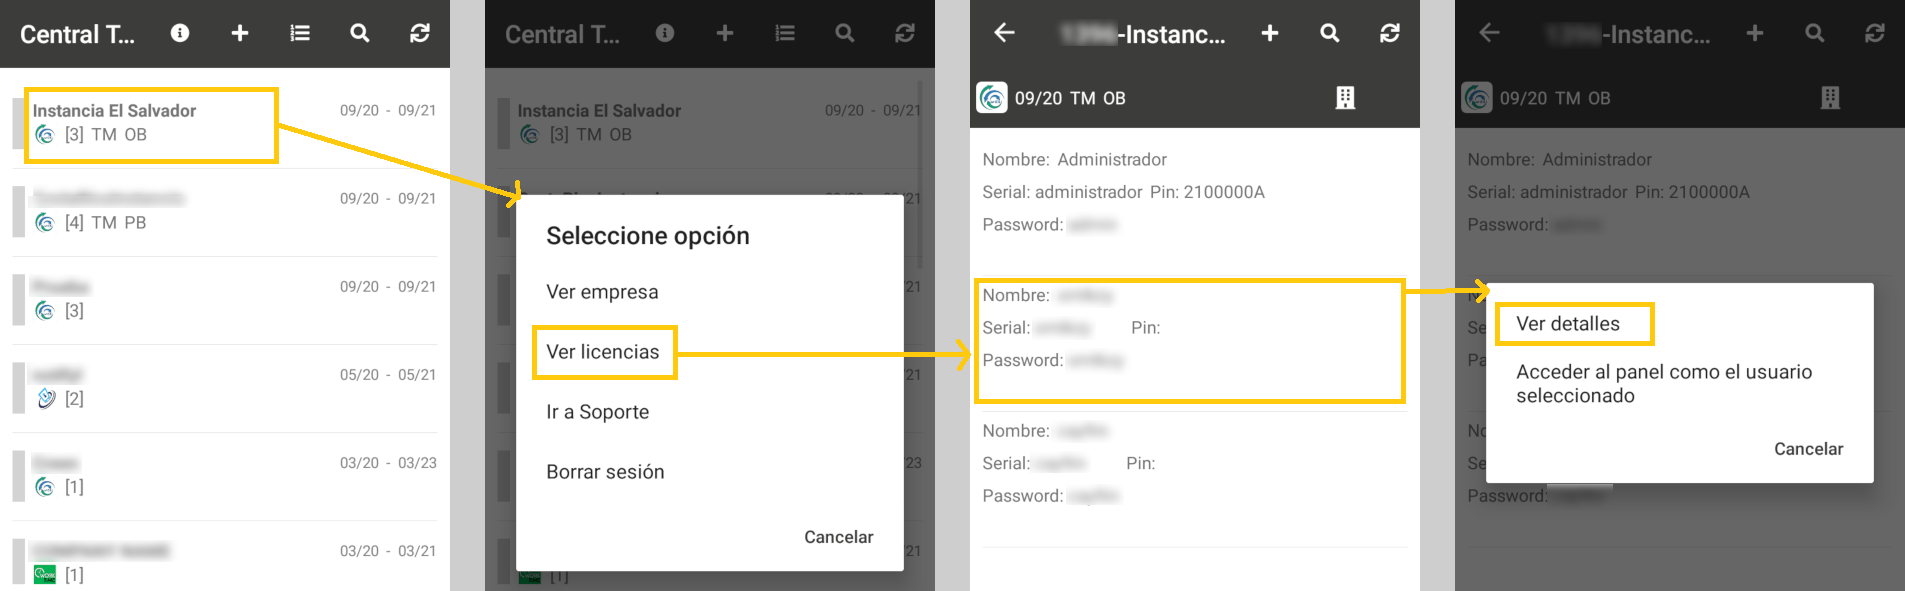
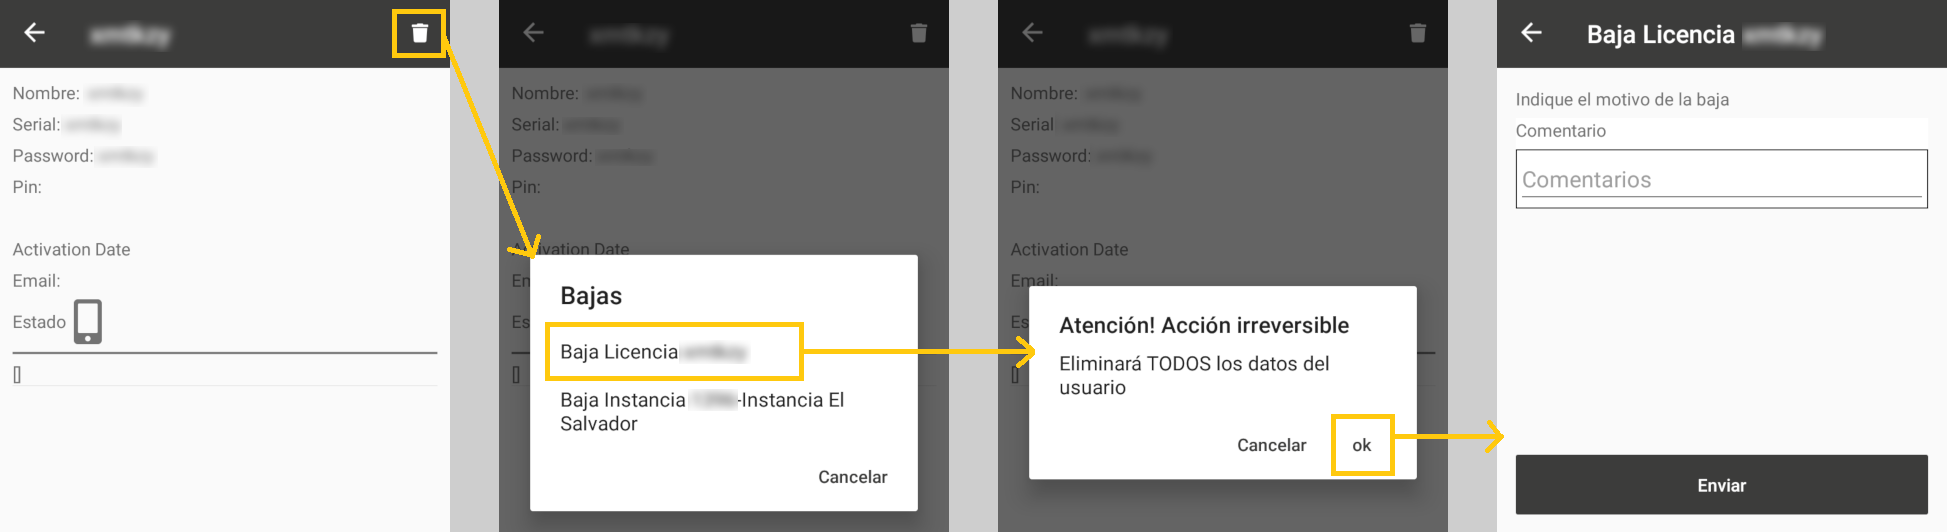
In the details window, the unsubscribe icon appears in the top menu . Select unsubscribe the license and confirm your choice.
Indicate the reason for the withdrawal and click on "Send".
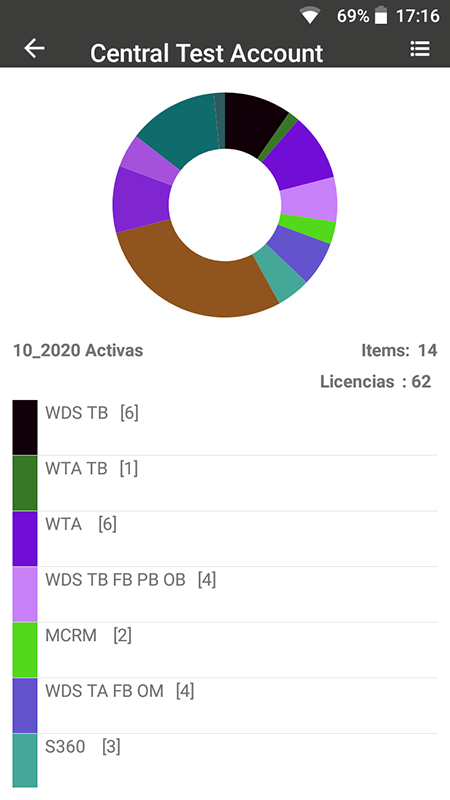
Reports
1. Top toolbar
- Show the reports tutorial on your mobile screen.
- Displays the instances of the graph in a list.
- Refresh the graphics.
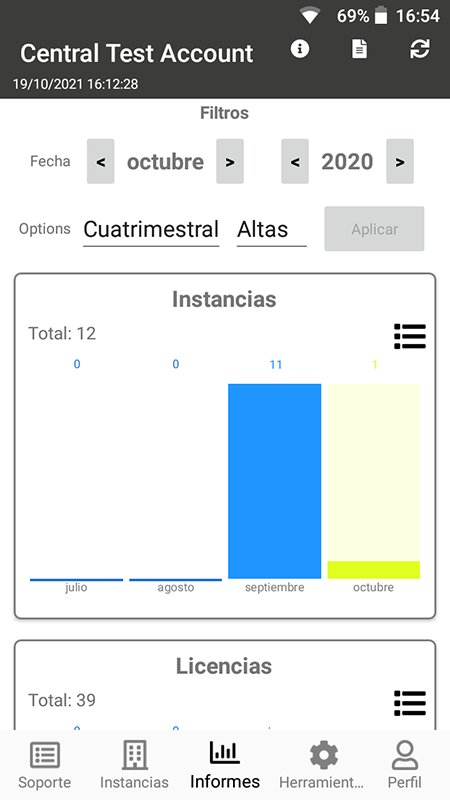
2. Filters
Period selection: activation date.
- Quarterly: shows the number of instances/licenses in 4 months, setting the selected month as the last.
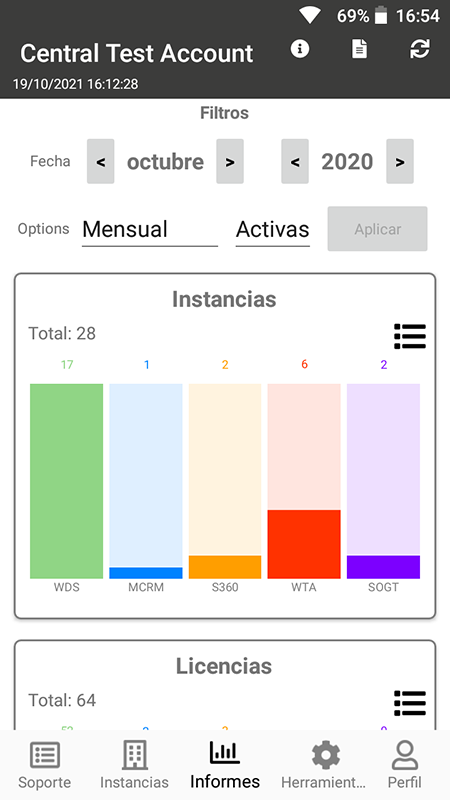
- Monthly: shows the number of instances/licenses by type (WDS, MCRM, S360, WTA).
State
- Registrations
- Unsubscriptions
- Active
Once you have your selection, click the "Filter" button to apply the changes. This button is disabled if you have not modified any filters and they correspond to the graph.
3. List
Pressing the top menu button shows the detailed list of the graph data.
Top bar
- Search by instance name or type.
- Donut chart by instance type.
- The list is exportable in Excel format.
Donut chart
Each color corresponds to a type of instance, in the case of WDS it is also divided by contracted profiles. By clicking on a specific item in the lower list you can see the detail in a new window.
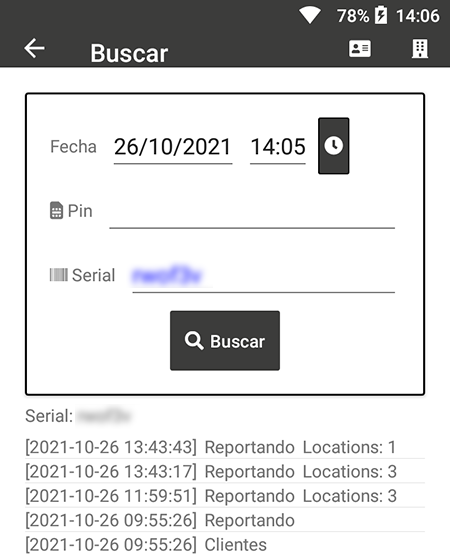
Tools
Search the activity of a terminal by serial or pin.
By clicking on any of the records found, you can see the details of the record.
To access the user/terminal information, click on the icon and the following window will be displayed:
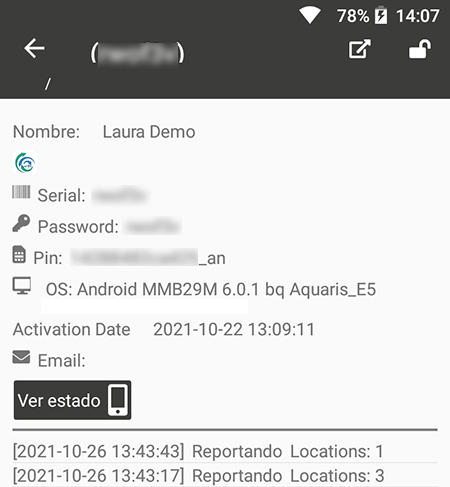
To release the license use the icon.
Profile

Top toolbar
- Show the profile tutorial on the mobile screen.
- Edit user.
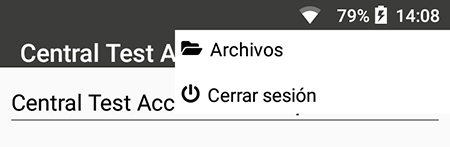
- Submenu with the following options:
- Access files related to your profile.
- Logout
WDS Compatibility
Some Working Day Suite features related to hardware depend on both the terminal manufacturer and the operating system and version. In the following PDF you will find a list of feature compatibility between the tested terminals. Download document